How To
How to make an infographic with PowerPoint
- March 18, 2020
- Updated: July 2, 2025 at 4:22 AM

Today we’re going to look at how to add some magic to your PowerPoint presentations by adding infographics to your visuals. You can even use your infographics elsewhere too. If you want to learn more about accessibility in Office
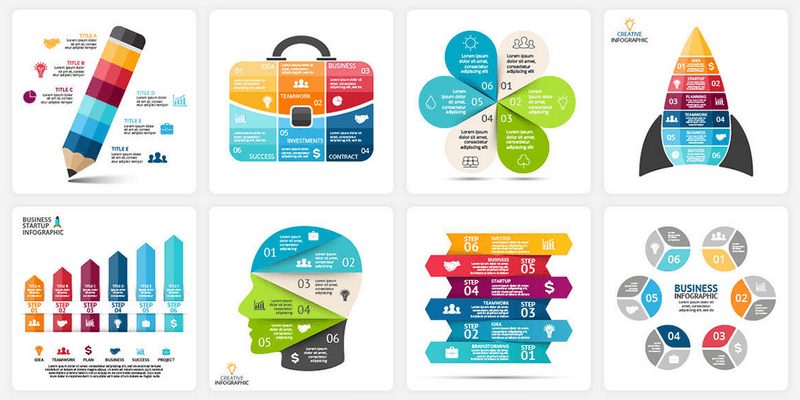
Infographics are powerful tools to take with you into a presentation. They visually paint an image that is then clearly defined by the text that is there too. They’re everywhere now as well, popping up on social media, in personal and corporate blogs, and even in government-produced brochures and pamphlets. The proliferation of infographics is down to one simple factor, they work. They’re a very effective means of engaging with and conveying information to an audience, which is why they’re so useful in PowerPoint presentations.
Resize the PowerPoint slide to size you need it to be
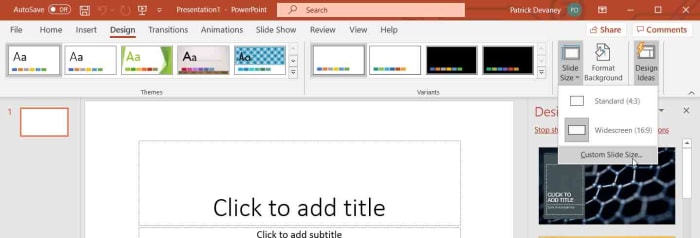
When you’ve opened PowerPoint, you need to hit the Design tab and then go to the Slide Size option and hit Custom Slide Size. You can then select Custom in the Slides sized for the dropdown menu. After that, you’re free to select your orientation and size. Most infographics are made in portrait orientation, but it depends on your individual needs.
Turn on rulers, gridlines, and guides
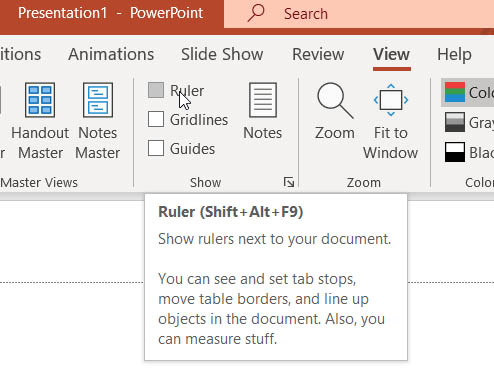
You’re going to be designing visual elements, so it’ll be a good idea to activate gridlines and rulers to help you keep your designs precise and symmetrical. To do this hit the View tab and check the box next to Rulers, Gridlines, and Guides.
Format the background of your slide
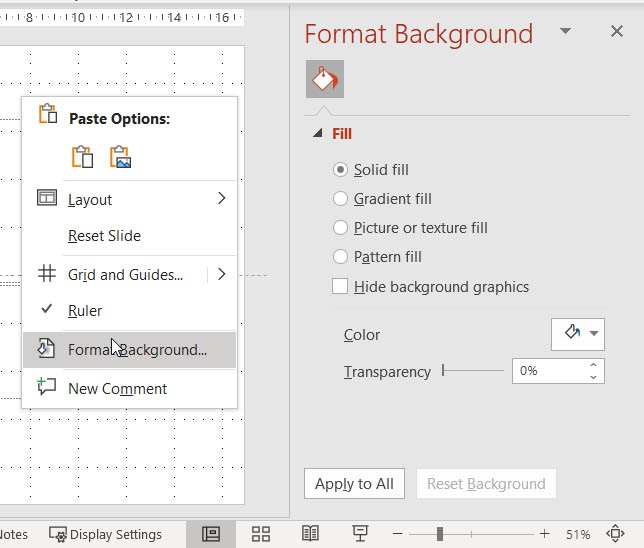
Some infographics are white, but most aren’t. To change the background color of your infographic you need to right-click anywhere on your slide and then select the Format Background. Doing this will open a dialog bow where you can decide on whether to use a Solid fill, Gradient fill, Picture or texture fill, or a Pattern fill. You’ll also be able to set the color and the level of transparency.
Build your header
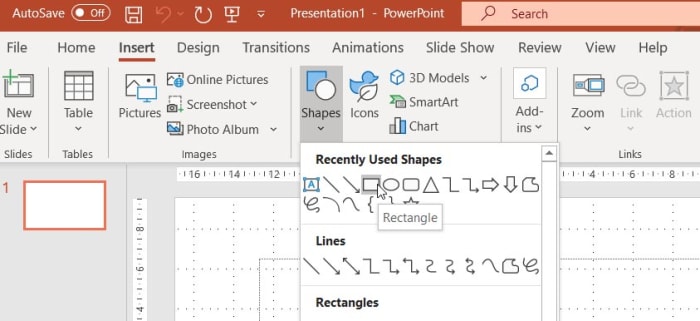
Once you’ve set your background color you should build your header. This is as simple as selecting Insert and then Shapes. Select the Rectangle option and then place it at the top of your slide. You can then add text to this shape and edit the size and font to get it looking exactly how you want it to.
Use more shapes to build the design elements you want to display in the background
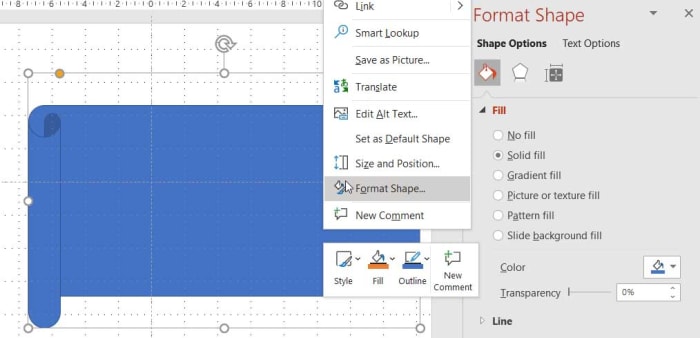
As you’ve activated rulers and gridlines you can add more shapes to your slide and maneuver them into the exact position they need to be to create interesting designs and effects. There are plenty of shapes available that can be manipulated and edited however you like. You simply need to put the shape where you want it and then right-click on it and select Format Shape.
Build extra elements using Shape Effects
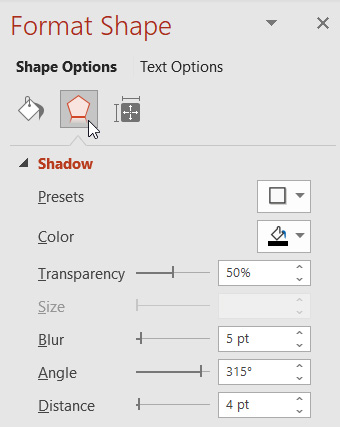
If you’ve designed your background well enough, you should already have a rather dynamic-looking base to build your infographic onto. What’s great is that PowerPoint makes this next step really easy by allowing you to add effects to the shapes you create. This means you can give them shadow, for example, to make it look like they’re floating above the background or make them glow to really stand out. Again, there are lots of options available here and you’re only limited by your imagination and the needs of your project.
Add SmartArt and Icons
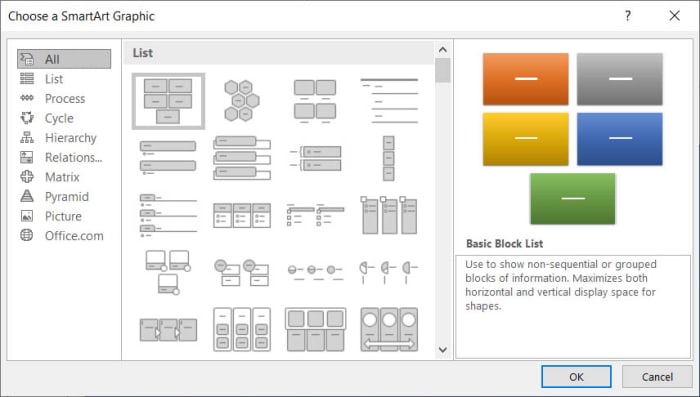
Once you’ve built your elements and added the effects, you only need to add the text to your infographics to convert the information you’re hoping to share. Of course, though, text isn’t the only way you can pass on information and fortunately, PowerPoint has many visual elements that you can use in your infographics.
SmartArt is kind of like Clip Art but has specifically been built for use in presentations and infographics. To add SmartArt to your infographic hit the Insert tab and then search out the Add SmartArt button.
Icons aren’t quite as dynamic as SmartArt, but they will help you add meaning and context to your infographic without having to use words. PowerPoint has a lot of icons for you to choose from split across many different categories. To add icons to your infographic again hit the Insert tab and then select the Insert Icons button in between the shapes and SmartArt buttons.
Wrapping up
You now have a grip on how to add all the dynamic visual elements that make up an effective infographic. Remember this is your project, so you are now free to customize and create your infographic based on what you need it to do and what you want it to say. As we’ve shown you, PowerPoint has a lot of tools available for making fantastic infographic visuals.
There is one final stage, however, that you need to take care of once you’ve finished building your infographic design. To export your infographic for use elsewhere you need to go to File and then Save As. The key is to save your infographic as either a JPG or PNG file and when PowerPoint asks you if you want to export all slides or just this one, select just this one. Once you’ve done that final step your infographic is available to use wherever you need it.
Patrick Devaney is a news reporter for Softonic, keeping readers up to date on everything affecting their favorite apps and programs. His beat includes social media apps and sites like Facebook, Instagram, Reddit, Twitter, YouTube, and Snapchat. Patrick also covers antivirus and security issues, web browsers, the full Google suite of apps and programs, and operating systems like Windows, iOS, and Android.
Latest from Patrick Devaney
You may also like
 News
NewsThe group of cyber threats that uses smart contracts to distribute malware
Read more
 News
NewsThe co-creator of Mortal Kombat warns that the first scene of the new movie is going to make us cry buckets
Read more
 News
NewsThe next season of Diablo 4 will have all these changes that you don't expect
Read more
 News
NewsMeta updates brand safety features
Read more
 News
NewsThis Christmas movie is everything you need to watch and get excited about with your family
Read more
 Article
HBO Max presents the French reinterpretation of a classic novel in its upcoming series
Read more